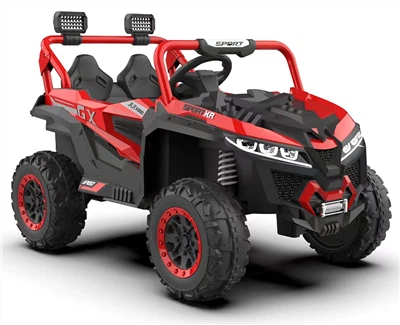
Hey there, ATV enthusiasts! I'm [your name], and I run a Quad ATV supply business. Cleaning your Quad ATV isn't just about making it look good; it's crucial for its performance and longevity. In this blog, I'll share my tips on how to clean a Quad ATV like a pro.
Why Cleaning Your Quad ATV Matters
Before we dive into the cleaning process, let's talk about why it's so important. When you ride your ATV, it gets covered in dirt, mud, and grime. If you don't clean it regularly, this buildup can cause damage to the engine, suspension, and other vital components. It can also lead to rust and corrosion, which can significantly reduce the lifespan of your ATV.
Regular cleaning also helps you spot any potential issues early on. You might notice a loose bolt, a leak, or some other problem while you're cleaning. Catching these issues early can save you a lot of time and money in the long run.


Gather Your Cleaning Supplies
First things first, you'll need to gather the right cleaning supplies. Here's what I recommend:
- A high - pressure hose: This is great for removing the bulk of the dirt and mud.
- Biodegradable ATV cleaner: It's important to use a cleaner that won't harm the environment or the ATV's finish.
- Soft brushes: Different sizes of soft brushes can help you get into all the nooks and crannies.
- Microfiber towels: These are gentle on the ATV's surface and won't scratch it.
- Wax: After cleaning, waxing your ATV will protect the paint and give it a nice shine.
Pre - Cleaning Inspection
Before you start cleaning, take a few minutes to inspect your ATV. Look for any loose parts, leaks, or damage. If you notice anything out of the ordinary, it's a good idea to address it before you start cleaning. This is also a good time to check the tire pressure and make sure all the lights are working.
The Cleaning Process
Step 1: Rinse the ATV
Start by using your high - pressure hose to rinse the entire ATV. Focus on the areas with the most dirt and mud, like the wheels, undercarriage, and fenders. This initial rinse will help loosen up the dirt and make the cleaning process easier.
Step 2: Apply the Cleaner
Once you've rinsed off the loose dirt, it's time to apply the biodegradable ATV cleaner. Follow the instructions on the cleaner's label. Usually, you'll want to dilute the cleaner in a bucket of water. Use a sponge or a soft brush to apply the cleaner to the ATV's surface. Make sure to cover all areas, including the engine, frame, and bodywork.
Step 3: Scrub the Tough Spots
Some areas, like the wheels and the undercarriage, may have stubborn dirt and grime. Use a soft brush to scrub these areas gently. Be careful not to scratch the surface. You might need to apply a little more cleaner to these tough spots and let it sit for a few minutes before scrubbing.
Step 4: Rinse Again
After you've scrubbed the ATV, rinse it thoroughly with the high - pressure hose. Make sure to remove all the cleaner from the surface. Any leftover cleaner can leave streaks or damage the paint.
Step 5: Dry the ATV
Use microfiber towels to dry the ATV. Start from the top and work your way down. Pay special attention to the areas where water can collect, like the engine and the electrical components. You can also use a leaf blower on a low setting to help dry hard - to - reach areas.
Step 6: Wax the ATV
Once the ATV is completely dry, it's time to wax it. Waxing will protect the paint and make the ATV look shiny. Apply the wax according to the product's instructions. Usually, you'll use a clean microfiber towel to apply the wax in a circular motion. Let the wax dry for a few minutes, and then buff it off with another clean microfiber towel.
Cleaning Specific Components
Wheels and Tires
The wheels and tires take a beating when you're riding your ATV. Use a wheel cleaner to remove brake dust and dirt from the wheels. A soft brush can help you get into the spokes and other tight areas. For the tires, you can use a tire cleaner or just a mild soap and water. Make sure to rinse the wheels and tires thoroughly after cleaning.
Engine
Cleaning the engine is a bit more delicate. Start by using a degreaser to remove oil and grease. Apply the degreaser carefully, making sure not to get it on any electrical components. Use a soft brush to scrub the engine, and then rinse it off with a low - pressure hose. Let the engine dry completely before starting it up again.
Electrical Components
Be very careful when cleaning the electrical components. Avoid getting water directly on them. If you need to clean around them, use a damp microfiber towel. Make sure the components are dry before you start the ATV.
Our ATV Products
As an ATV supplier, I'm proud to offer a range of high - quality Quad ATVs. Check out our 12V Six Wheels ATV, which is perfect for young riders. It's got great stability and a cool design.
If you're looking for an ATV that can handle all terrains, including the beach, our 12V All Terrain Beach Off - road Vehicle is a great choice. It's built tough and can provide hours of fun.
For the more serious riders, we have the Licensed Can Am Renegade ATV. This ATV is a beast on the trails and offers top - notch performance.
Conclusion
Cleaning your Quad ATV is an important part of ATV ownership. By following these steps and using the right cleaning supplies, you can keep your ATV in great shape for years to come. If you're interested in purchasing an ATV or have any questions about our products, don't hesitate to reach out. We're here to help you find the perfect ATV for your needs.
References
- ATV Maintenance Manuals
- ATV Enthusiast Magazines
- Personal Experience from Years of ATV Supply Business