

Hey there, fellow go-kart enthusiasts! I'm a supplier in the go-kart game, and I know how exciting it is to get your hands dirty and work on these cool machines. One of the most crucial parts of building or upgrading a go-kart is installing the engine. In this blog, I'll walk you through the step-by-step process of installing a go-kart engine. So, let's rev up those engines and get started!
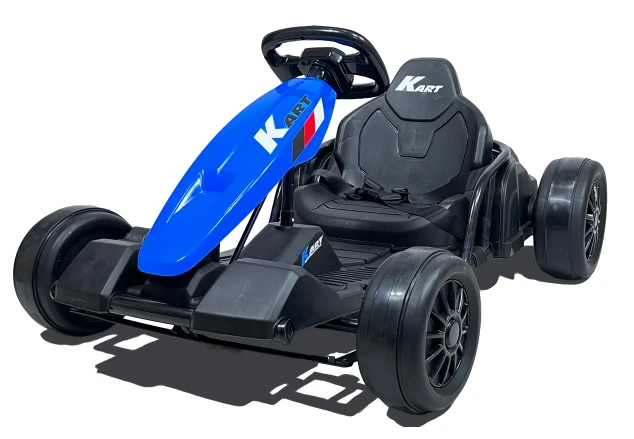

Step 1: Gather Your Tools and Parts
Before you start installing the engine, you need to make sure you have all the necessary tools and parts. Here's a list of what you'll typically need:
- Engine: Make sure you have the right engine for your go-kart. Different go-karts require different engine sizes and types. You can check out our 24V DRIFT GO KART, BENZ Go Kart, and ABARTH Go Kart to see the engines they use.
- Wrenches: You'll need a set of wrenches to remove and install bolts.
- Screwdrivers: Both flathead and Phillips head screwdrivers will come in handy.
- Socket set: This is useful for removing and installing nuts and bolts.
- Pliers: You might need pliers to hold small parts or bend wires.
- Engine mounting hardware: This includes bolts, nuts, and washers to secure the engine to the go-kart frame.
- Chain or belt: Depending on your go-kart's design, you'll need a chain or belt to transfer power from the engine to the wheels.
- Fuel tank: Make sure you have a fuel tank that's compatible with your engine.
- Spark plug: A new spark plug is essential for proper engine ignition.
- Oil: You'll need to fill the engine with the right type and amount of oil.
Step 2: Prepare the Go-Kart Frame
The first thing you need to do is prepare the go-kart frame for the engine installation. Here's how:
- Clean the frame: Use a wire brush or sandpaper to clean the area where the engine will be mounted. This will ensure a good connection between the engine and the frame.
- Check the frame for damage: Look for any cracks or bends in the frame. If you find any, you'll need to repair or replace the frame before installing the engine.
- Mark the mounting holes: Use a marker to mark the positions of the engine mounting holes on the frame. This will make it easier to align the engine later.
Step 3: Install the Engine Mounting Brackets
Once the frame is prepared, it's time to install the engine mounting brackets. Here's how:
- Position the brackets: Place the engine mounting brackets on the frame according to the marks you made earlier. Make sure the brackets are level and aligned properly.
- Secure the brackets: Use bolts, nuts, and washers to secure the brackets to the frame. Tighten the bolts firmly, but don't over-tighten them.
Step 4: Install the Engine
Now it's time to install the engine on the mounting brackets. Here's how:
- Lift the engine: Use a hoist or a couple of friends to lift the engine onto the mounting brackets. Make sure the engine is centered and aligned with the mounting holes.
- Secure the engine: Use bolts, nuts, and washers to secure the engine to the mounting brackets. Tighten the bolts firmly, but don't over-tighten them.
- Connect the electrical wires: Connect the electrical wires from the engine to the go-kart's electrical system. This includes the spark plug wire, the ignition switch wire, and the battery wire.
- Connect the fuel line: Connect the fuel line from the fuel tank to the engine. Make sure the connection is tight and there are no leaks.
Step 5: Install the Chain or Belt
Once the engine is installed, it's time to install the chain or belt to transfer power from the engine to the wheels. Here's how:
- Measure the chain or belt: Measure the length of the chain or belt you need based on the distance between the engine sprocket and the wheel sprocket.
- Install the sprockets: Install the engine sprocket and the wheel sprocket on their respective shafts. Make sure the sprockets are aligned properly.
- Install the chain or belt: Place the chain or belt around the sprockets and adjust the tension. The chain or belt should be tight enough to transfer power, but not so tight that it causes excessive wear.
Step 6: Install the Air Filter and Exhaust System
The air filter and exhaust system are important for the engine's performance and longevity. Here's how to install them:
- Install the air filter: Place the air filter on the engine's air intake. Make sure the filter is properly seated and secured.
- Install the exhaust system: Connect the exhaust pipe from the engine to the muffler. Make sure the connection is tight and there are no leaks.
Step 7: Fill the Engine with Oil
Before you start the engine, you need to fill it with the right type and amount of oil. Here's how:
- Check the oil level: Use the dipstick to check the oil level in the engine. If the oil level is low, add the recommended type and amount of oil.
- Fill the oil: Remove the oil filler cap and pour the oil into the engine. Be careful not to overfill the engine.
- Check the oil level again: After filling the oil, use the dipstick to check the oil level again. Make sure the oil level is within the recommended range.
Step 8: Test the Engine
Once you've installed the engine and all the necessary components, it's time to test the engine. Here's how:
- Check the fuel level: Make sure the fuel tank is filled with the right type and amount of fuel.
- Turn on the ignition: Turn the ignition switch to the "on" position.
- Pull the starter cord: Pull the starter cord to start the engine. If the engine doesn't start, check the spark plug, fuel line, and ignition system.
- Let the engine warm up: Let the engine run for a few minutes to warm up. During this time, listen for any unusual noises or vibrations.
- Test the throttle: Gradually open the throttle to see how the engine responds. Make sure the engine runs smoothly and the throttle is working properly.
Step 9: Final Checks
After testing the engine, it's important to do a final check to make sure everything is in order. Here's what you should check:
- Check the oil level: Use the dipstick to check the oil level in the engine. Make sure the oil level is within the recommended range.
- Check the fuel level: Make sure the fuel tank is filled with the right type and amount of fuel.
- Check the chain or belt tension: Make sure the chain or belt is properly tensioned.
- Check the electrical connections: Make sure all the electrical connections are tight and there are no loose wires.
- Check the exhaust system: Make sure the exhaust system is properly connected and there are no leaks.
Conclusion
Installing a go-kart engine might seem like a daunting task, but with the right tools, parts, and instructions, it can be a fun and rewarding experience. By following the steps outlined in this blog, you should be able to install a go-kart engine like a pro. If you have any questions or need further assistance, don't hesitate to contact us. We're a go-kart supplier, and we're here to help you with all your go-kart needs. Whether you're looking for a new engine, parts, or accessories, we've got you covered. So, what are you waiting for? Contact us today to start your go-kart project!
References
- Go-Kart Engine Installation Manuals
- Online Go-Kart Forums and Communities


